Testing Your Changes in the App
You should develop and test your changes with the JUnit environment that is provided by the NewPipe Extractor and IDEA. If you want to try it with the actual frontend, you need to follow these steps.
Setup Android Studio
First, you'll want to set up a working Android Studio environment. To do this, download Studio from developer.android.com, and follow the instructions on how to set it up.
Get the NewPipe Code and Run it.
In order to get it, you simply clone or download it from the current dev branch
github.com/TeamNewPipe/NewPipe.git.
You can then build and run it following these instructions.
Also, make sure you are comfortable with adb since
you might experience some trouble running your compiled app on a real device, especially under Linux, where you
sometimes have to adjust the udev rules in order to
make your device accessible.
Run Your Changes on the Extractor
There are several ways to test your extractor version in NewPipe. We will show you the most convenient ones:
Using local folder
In NewPipe app root folder, edit settings.gradle file and add this:
includeBuild('../NewPipeExtractor') {
    dependencySubstitution {
        substitute module('com.github.TeamNewPipe:NewPipeExtractor') with project(':extractor')
    }
}
includeBuild should have the relative path as argument. ../NewPipeExtractor means one folder up in hierarchy,
and the folder is exactly named NewPipeExtractor. If that's not the case, edit this part.
Using JitPack
Another way is to use JitPack. This is a build service that can build maven *.jar packages for Android and Java based on GitHub or GitLab repositories.
To use the extractor through JitPack, you need to push it to your online repository of
your copy that you host either on GitHub or GitLab. It's important to host
it on one of both. To copy your repository URL in HTTP format, go to JitPack and paste it there.
From here, you can grab the latest commit via GET IT button.
I recommend not to use a SNAPSHOT, since I am not sure when snapshot is built. An "implementation" string will be generated
for you. Copy this string and replace the implementation 'com.github.TeamNewPipe:NewPipeExtractor:<commit>' line in
the file /app/build.gradle with it.
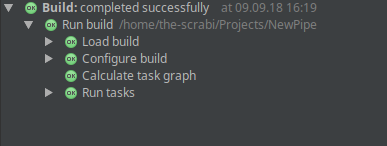
If everything synced well, then you should only see a screen with OK signs. Now you can compile and run NewPipe with the new extractor.
Troubleshooting
If something went wrong on JitPack site, you can check their build log, by selecting the commit you tried to build and
click on that little paper symbol next to the GET IT button. If it's red, it means that the build failed.
